My First Web3 dApp Architecture
Architecture review of the Web3RSVP dapp built during 30DaysOfWeb3


I built my first dApp with the 30DaysOfWeb3 curriculum by WomenBuildWeb3. In this article I will review the architecture diagram end-to-end.
Learn more about 30 Days Of Web3 here.
Web3RSVP - dApp Overview
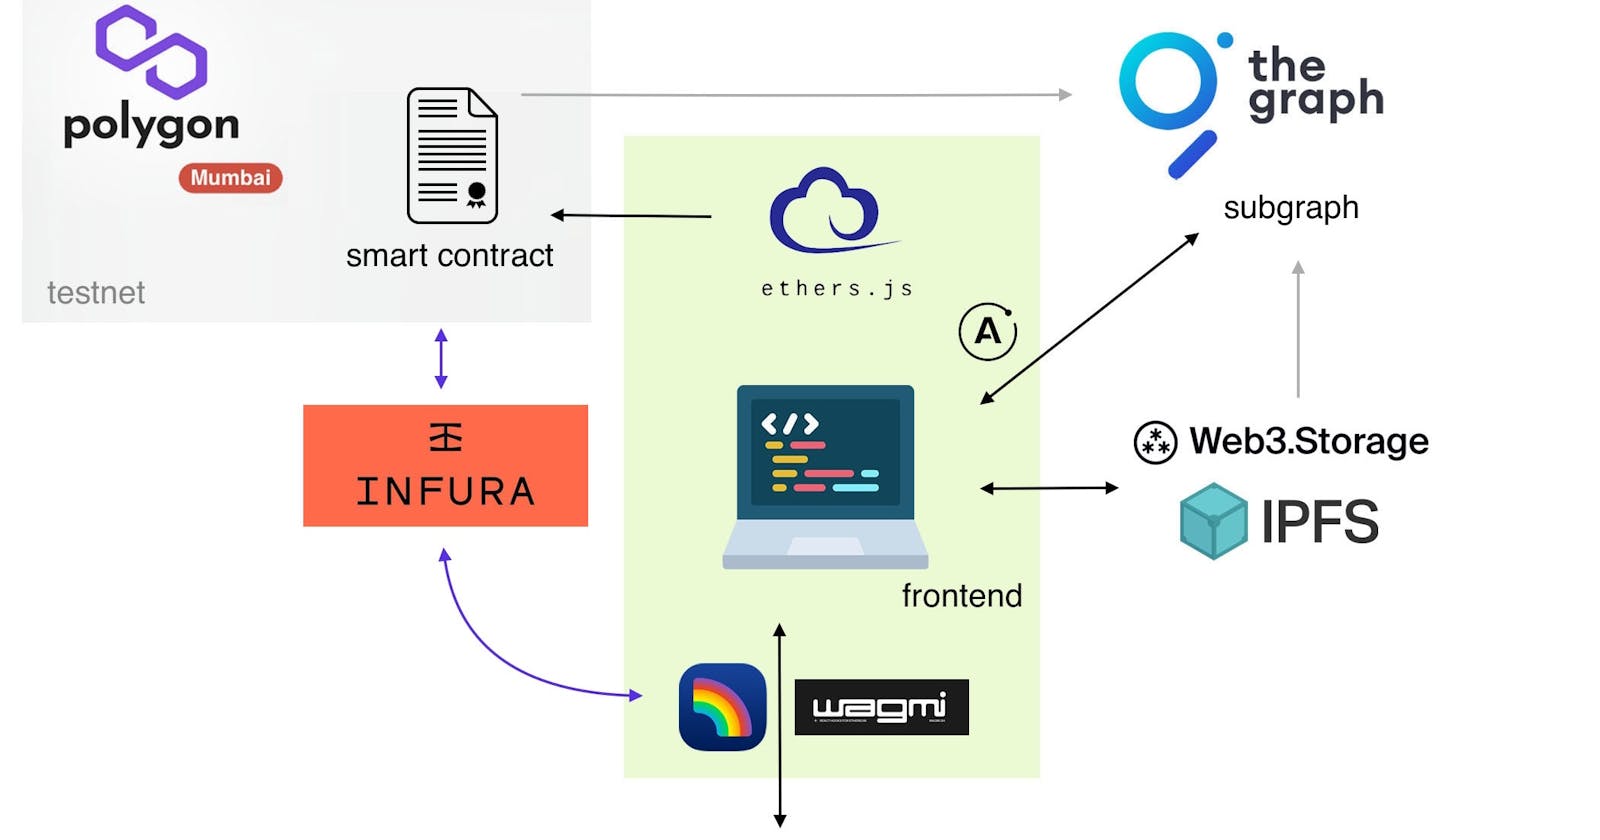
With 30DaysOfWeb3 you’re going to build (or you’ve already built!) an event management and creation application which uses the following stack: Polygon, IPFS, Web3.Storage, TheGraph, Infura, RainbowKit, wagmi, Ether.js, and other. The application will allow users to access with their wallet, create an event, respond to an event, confirm attendance.
 When I started the course I didn’t know most of these technologies and couldn’t make much sense of the diagram above. So I took some notes while I was building and then reviewed each piece at the end of it, re-drawing it in a way that cleared out some of the doubts I had.
I hope this article can be helpful for anyone who is starting the curriculum or has just finished it and wants to review the architecture from a different point of view.
tip: If you are a visual learner, I do encourage you to take the time to pause when you’re building, and draw some lines of code. Understanding through an image can be very powerful tool to retain knowledge but also to be able to explain it to others.
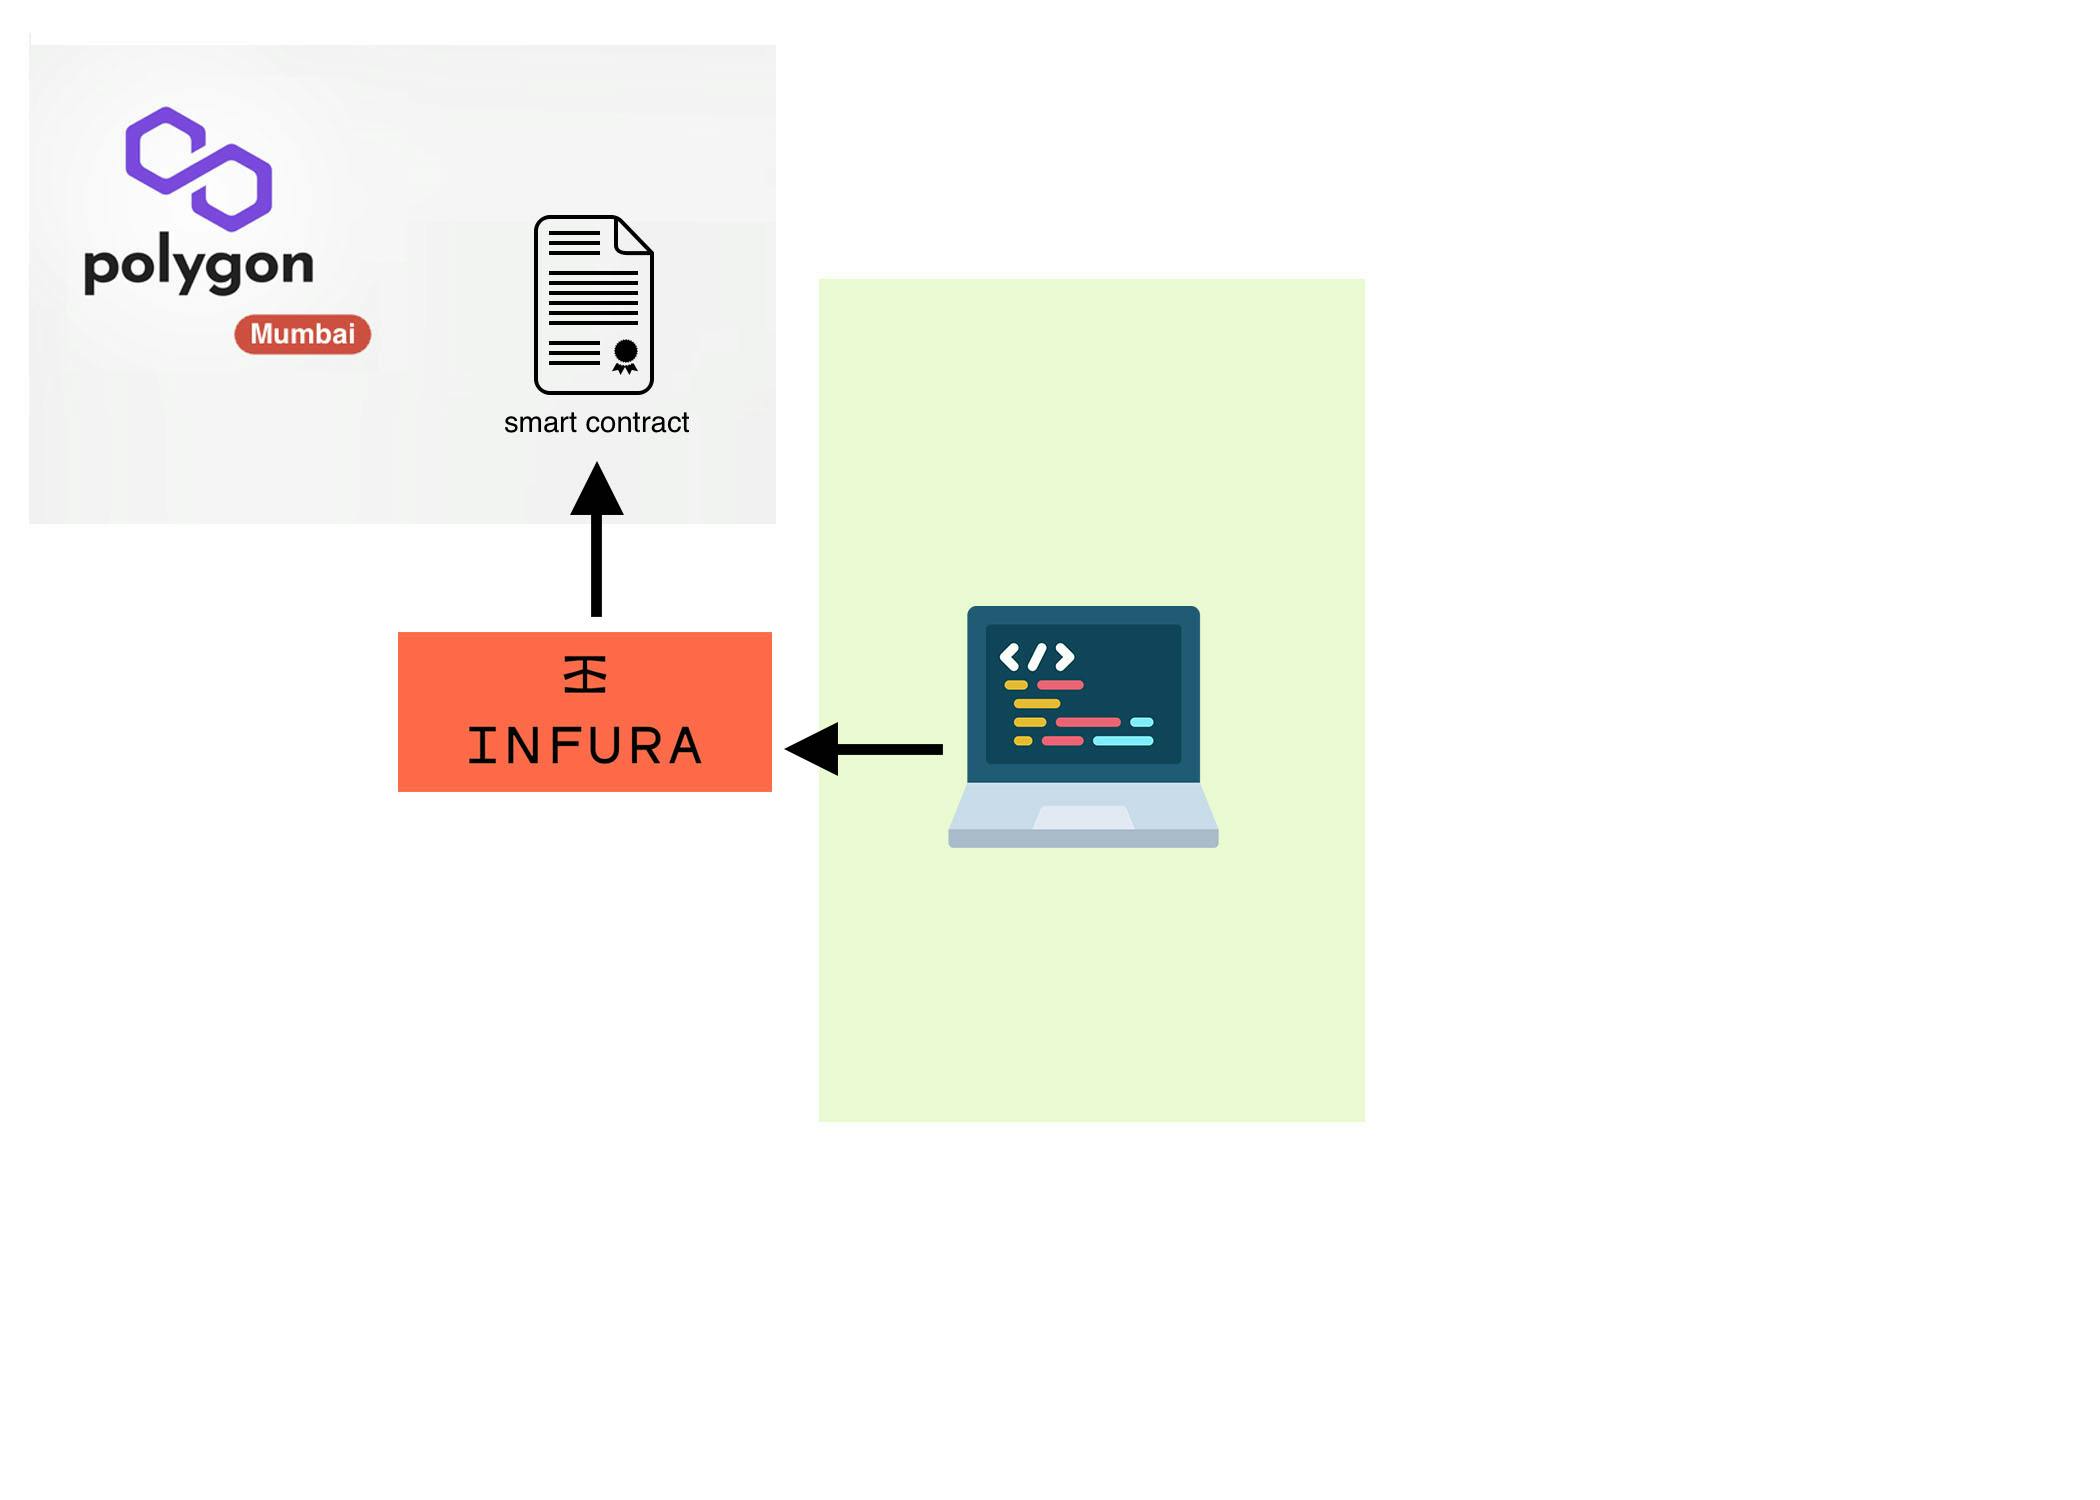
Step 1 - smart contract
The first thing you’ll do with the curriculum is to write and deploy your smart contract to Polygon Testnet (Mumbai) using Infura.
Why? Without a provider like Infura you would need to run your own node to deploy a contract.
 After your smart contract is deployed and verified in Polygon Testnet you can proceed to build the other two important pieces of the dapp, the subgraph and the frontend.
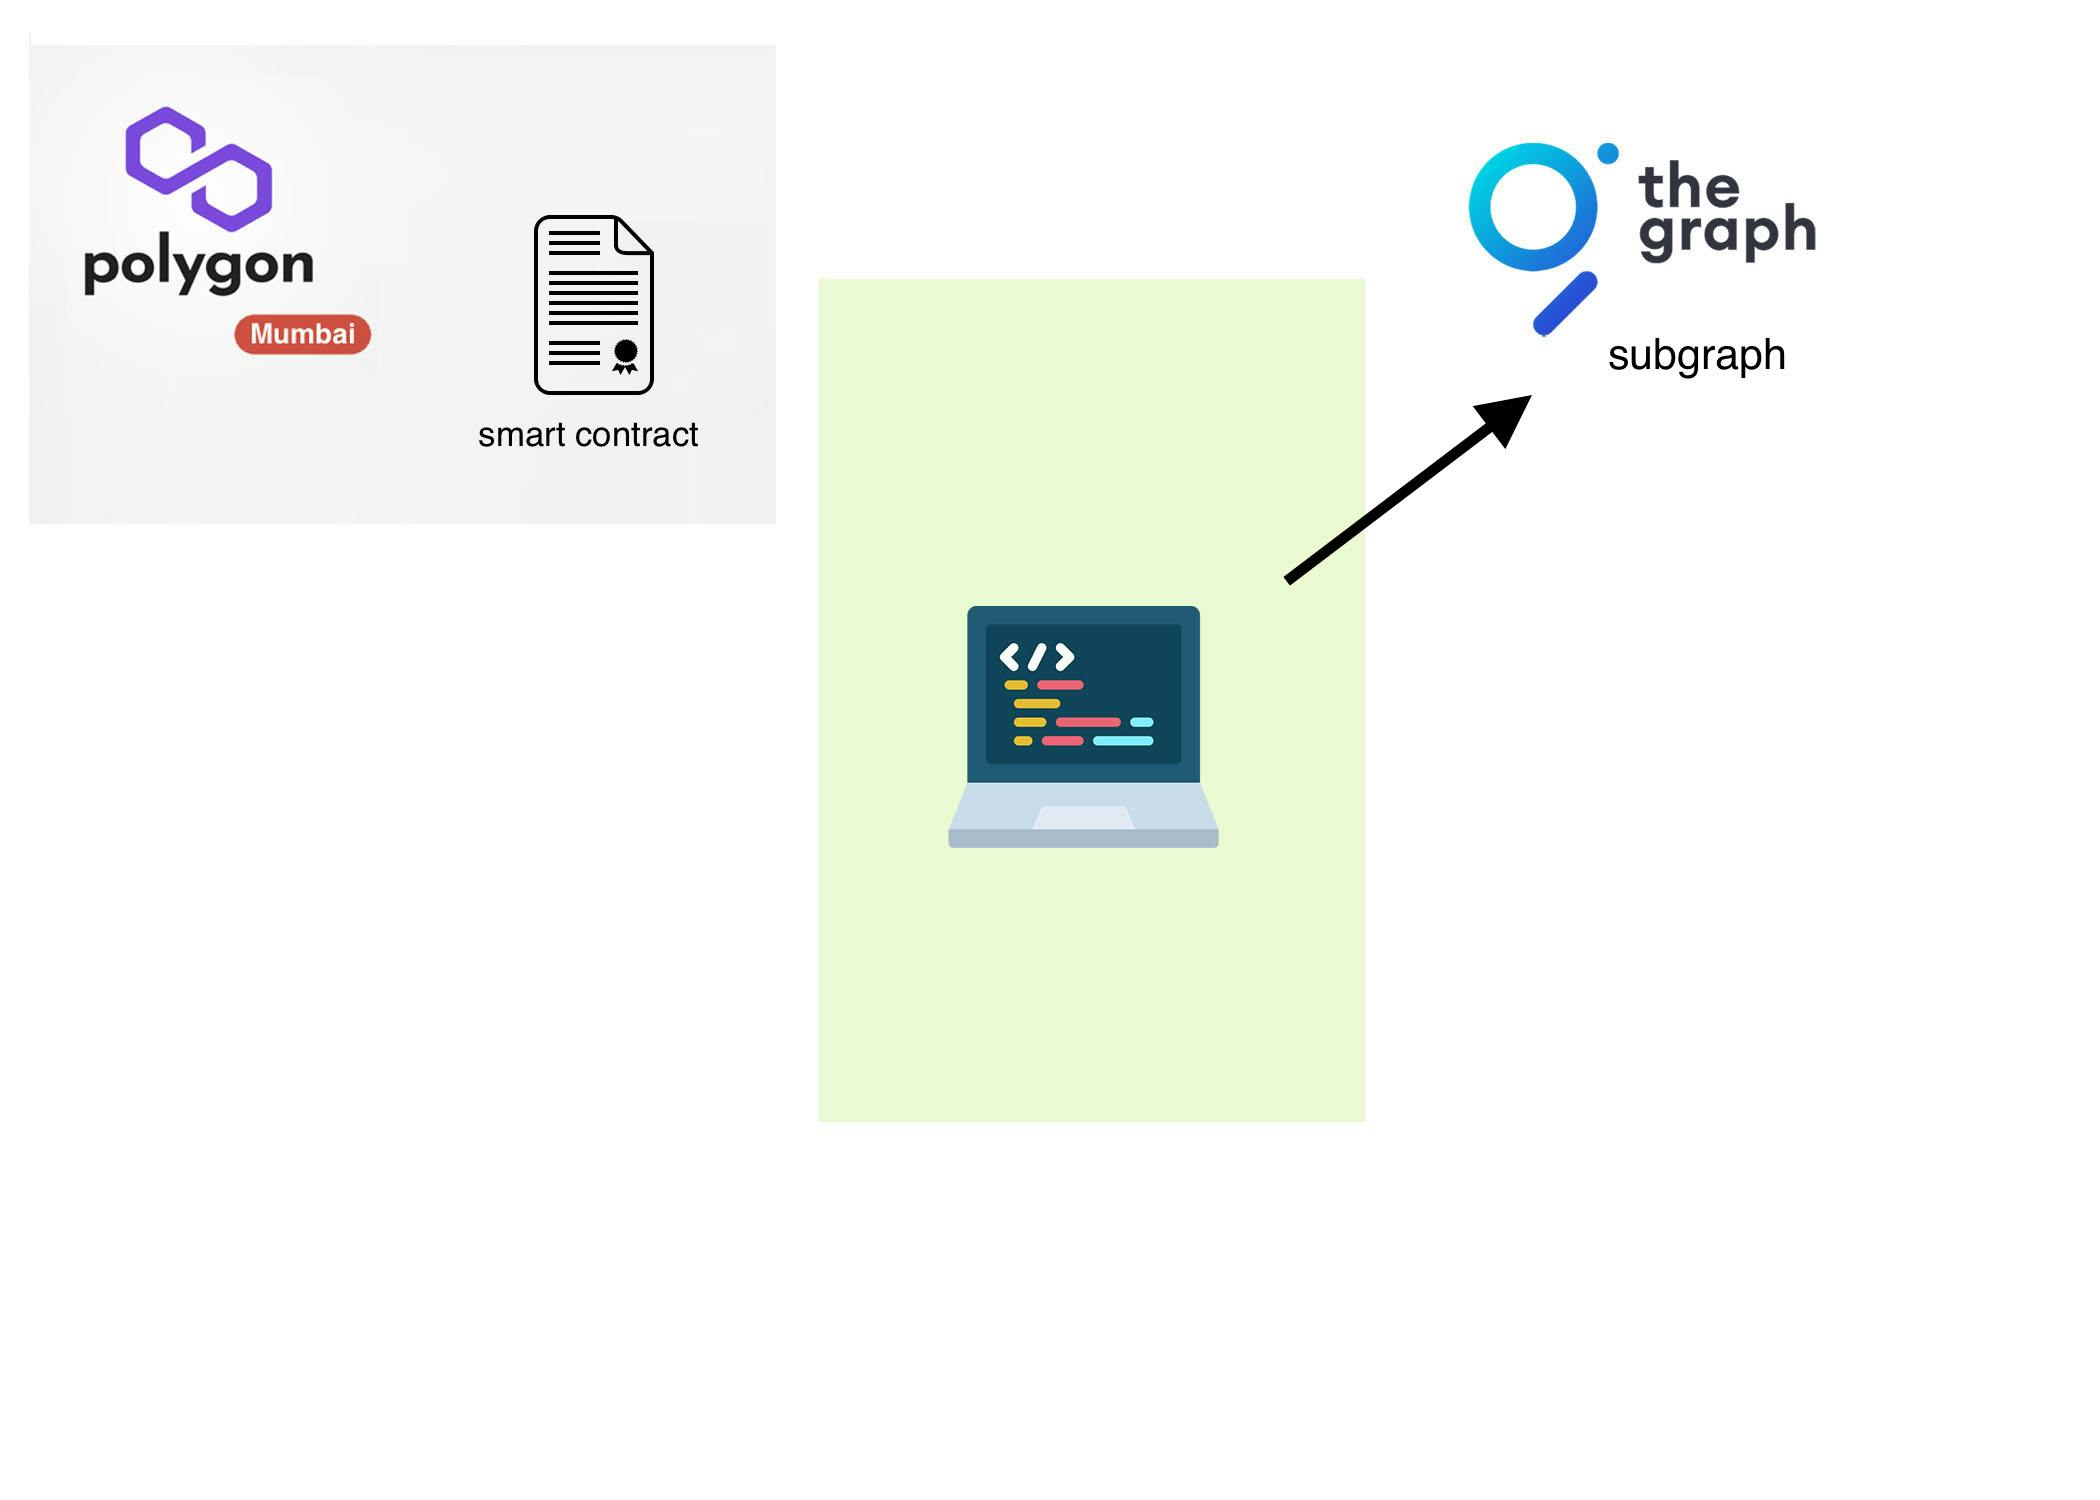
Step 2 - subgraph
The subgraph is basically an API which you will deploy through The Graph protocol and it will allow you to connect the frontend to the contract, so you can fetch the data for your frontend later.
Why? Without a subgraph it you would need to run your own indexing server to be able to query the smart contract data, which is expensive and vulnerable to down-time plus censorship.
 Alright, now that you have a smart contract and a subgraph, you’ll be heading to the frontend part in the curriculum. Here is where you’ll start seeing each element connecting and interacting.
Step 3 - frontend
For the frontend to work properly there are few tools and libraries you’ll need, they will enable: transactions and authorization, data storing in the blockchain, data query and display.
Let’s break it down.
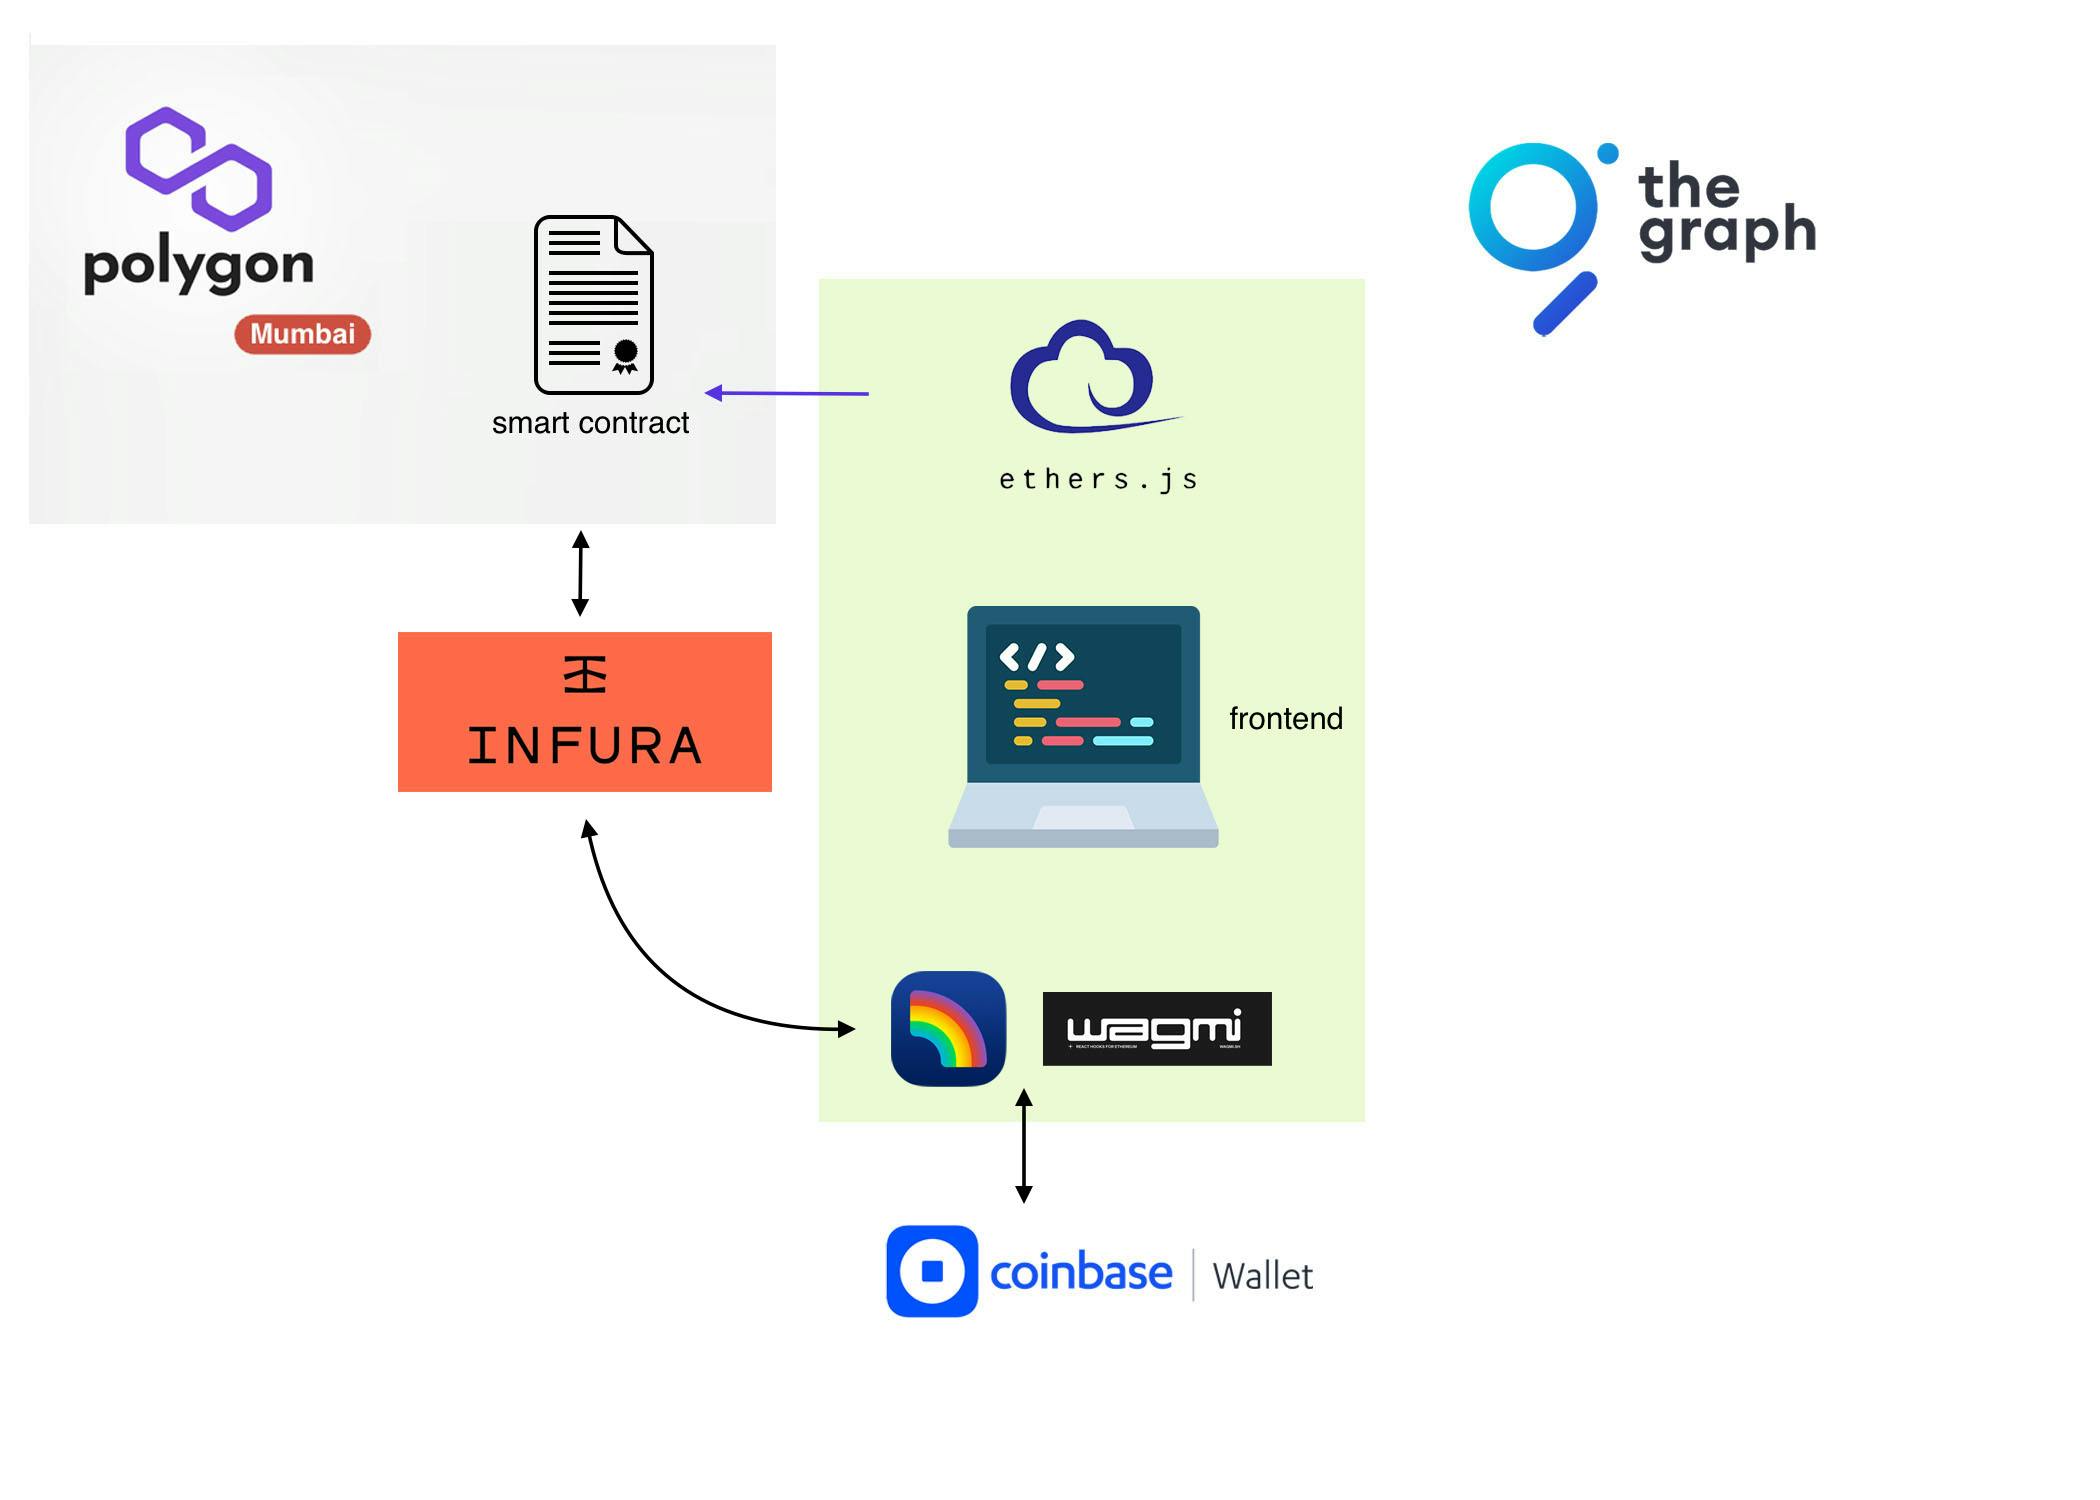
- transactions and authorization
- Ethers.js which calls the smart contract’s functions
- RainbowKit and wagmi to allow your app to connect to user’s wallet and wait for the transaction approval
(Infura provider connects to the network for us, and requests the transaction approval)
- data storing
- Web3.Storage will enable your app to store/retrieve data (the event details and image) from Filecoin (built upon IPFS) and get an id (cid) in return
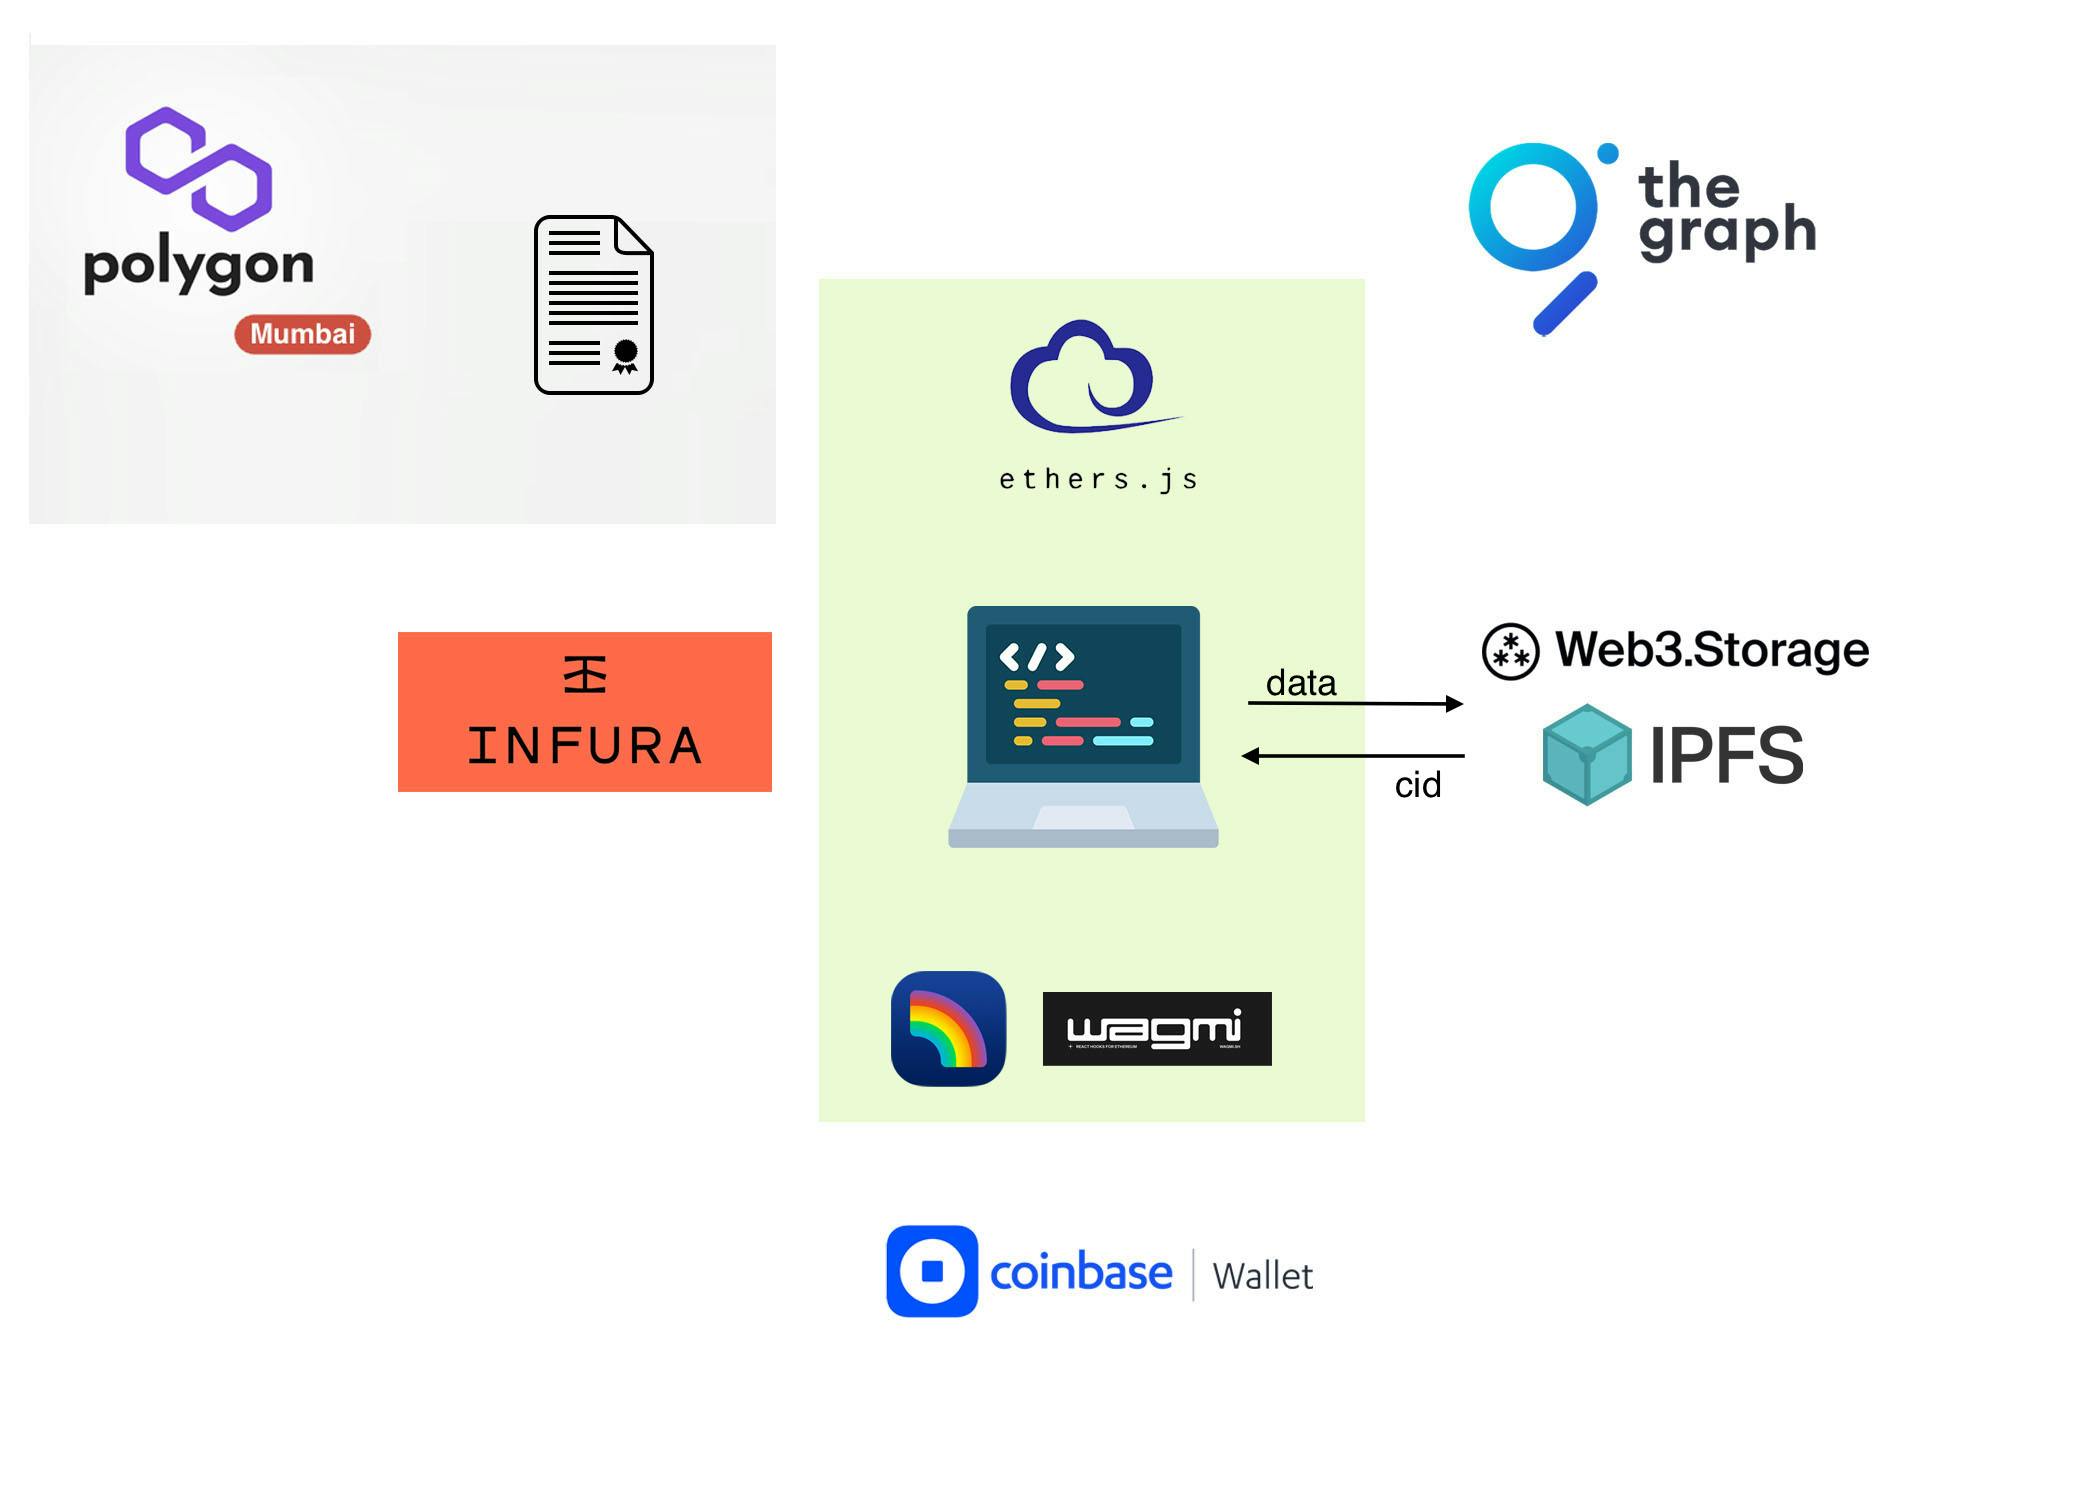
- Web3.Storage will enable your app to store/retrieve data (the event details and image) from Filecoin (built upon IPFS) and get an id (cid) in return
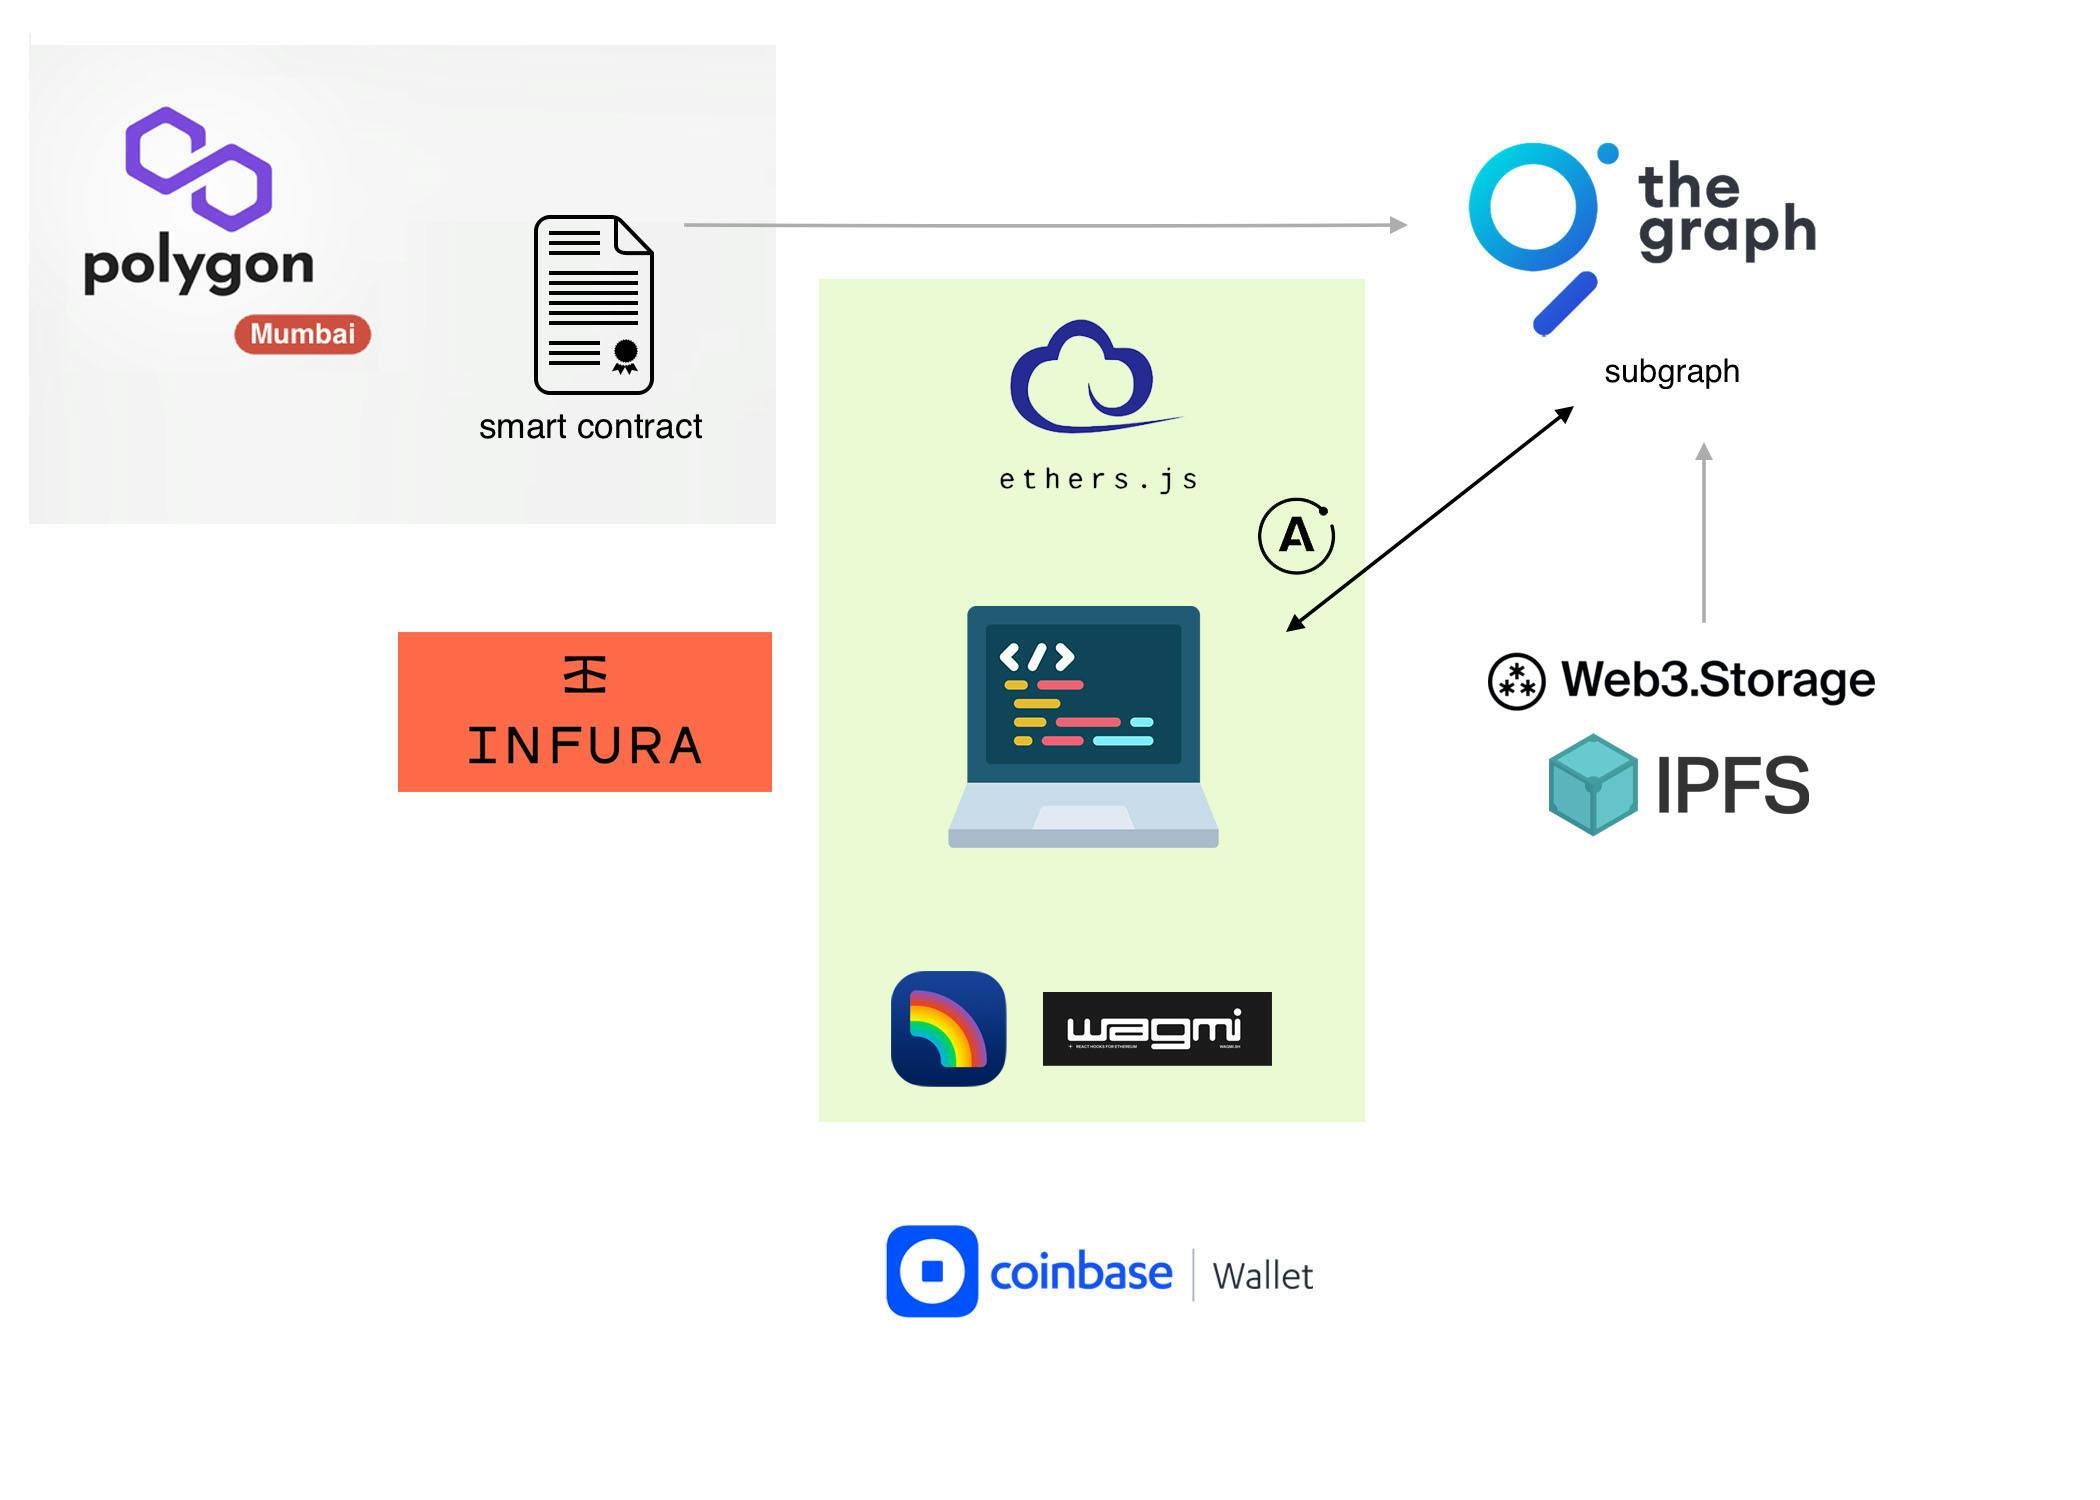
- data query
- Apollo GraphQL client will allow your frontend to easily query the subgraph and consequently to display the data.
- The subgraph will be pulling the event details and image url from the IPFS
Wrap up
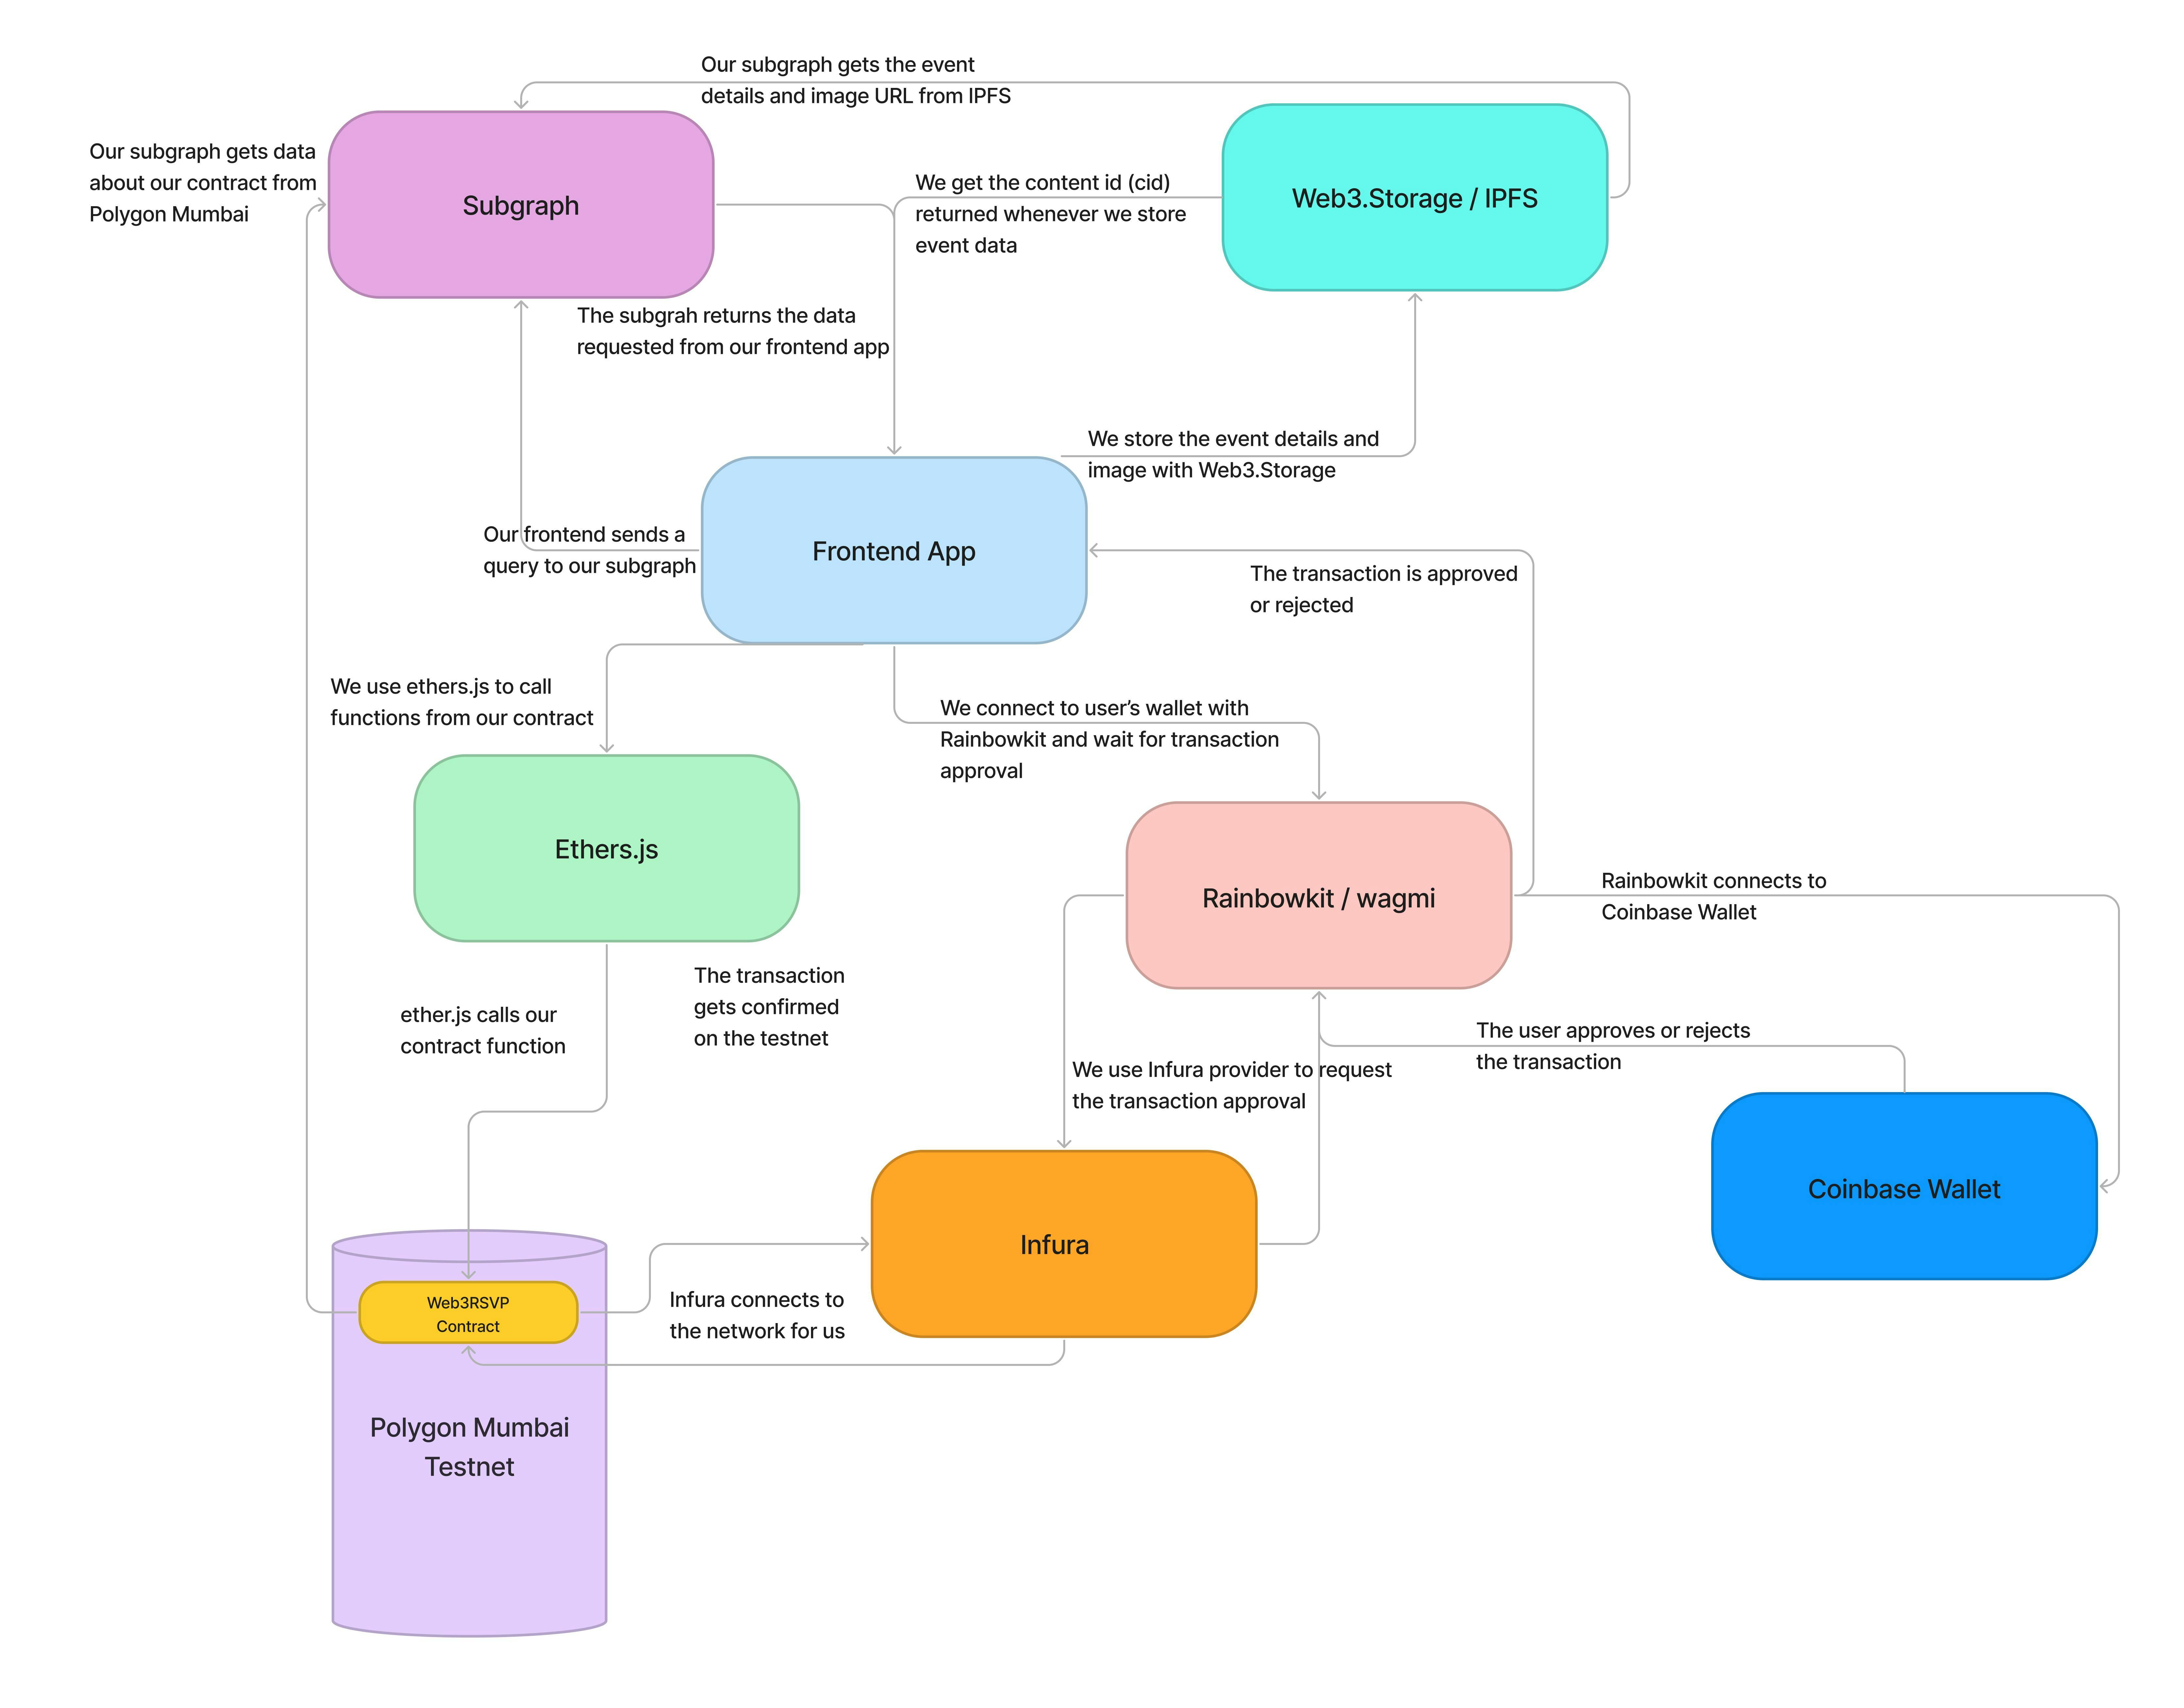
If we look at the application running through the different functions, here is a view of all the connections:
 It’s a simplified overview but I hope it was helpful for you as it was for me to go through it. If there’s some part missing or something you would like to have better explained, let me know in the comments below ;)